ZPOST
BMW Garage BMW Meets Register Today's Posts


Go Back   ZPOST > BMW Z4 Roadster and Coupe > General BMW Z4 Forum
  TireRack

SUPPORT ZPOST BY DOING YOUR TIRERACK SHOPPING FROM THIS BANNER, THANKS!
Post Reply
 
Thread Tools Search this Thread
      01-21-2012, 11:03 AM   #23
Swanicyouth
Private
1
Rep
66
Posts

Drives: Z4M
Join Date: Mar 2011
Location: Limerick PA

iTrader: (0)

I was wondering if someone who has replaced an exhaust hub or who is very familiar with the procedure could answer a few questions. I was looking at the procedure, and wondering about the tools required. It seems BMW says you need the jig to hold the cams, a black electrical box the plugs into the Vanos solenoids, and another special Vanos tool. Does anyone know if the electrical box is required to r and r the S54 Vanos? Do you need any of the special tools to replace the Vanos or just the exhaust sprocket? Thanks
Appreciate 0
      01-21-2012, 03:20 PM   #24
wrose
Private
Canada
13
Rep
91
Posts

Drives: 2007 Z4MC
Join Date: Oct 2009
Location: NS,Canada

iTrader: (1)

Garage List
2006 Z4M Roadster  [8.50]
2007 Z4MC  [0.00]
2005 X3  [0.00]
You do not need the electric box(just remove the caps from the Vanos unit-at front 3 bolts each and that will release the vanos pressure). I did use the bmw cam lock tool-tried it first without it with no success. there is a great thread on M3 Forumn on the repair -Video is great .
Let me know if details required and I'll dig them up.
Appreciate 0
      01-21-2012, 03:37 PM   #25
onebluemcm
Captain
onebluemcm's Avatar
42
Rep
632
Posts

Drives: '07 Z4MC
Join Date: Apr 2010
Location: Richmond, VA

iTrader: (0)

Quote:
Originally Posted by turbotoy2791 View Post
This was a failed exhaust hub that my brother and I modified. The new tabs are made from 4130 chrome moly. The ring is pressed over the hub .250 then tig welded with 312 ss. The dimension are the same other than the tabs being thicker. We need more hubs too fix so if you have one let me know


This is comment worthy, big time. Nice Job!!! I think you should send a really well laid out explanation of your fix to BMW to show them how they should have done it in the first place....
__________________
<img src=http://i284.photobucket.com/albums/ll30/onebluemcm/RG63_08-1-1.jpg border=0 alt= />
|=.-._.-._.-._.-._.-._.-._.-._.-._.-._.-._.-.=|
Silbergrau A08 / Sepang Brown LSD6 / Carbon Leather 4MY (1 of 3, this combo)
RAC RG63 | Conti EC-DW | GC/Koni-Dinan | Rogue RSM | Arqray | Autosolutions | BMW brace | Pinnacle tint
Appreciate 0
      01-21-2012, 07:15 PM   #26
turbotoy2791
300 Maraging hub
1
Rep
11
Posts

Drives: m3
Join Date: Jan 2012
Location: nc

iTrader: (0)

vanos hub

you dont need the bmw timing tool if you know how to use a square.
There is some videos on youtube of how to take it apart.
I tried it the first time by marking the cams with no success. but now I have no problems timing the cams.
Before you take the hubs completely lose from the cams make sure your on top dead center.

when you go to reinstall stick a 1/4 extension in the crank hole to lock it at tdc make sure its at tdc there is a couple holes but only one tdc
there is a hole in the camshafts find a screwdriver or something that fits inside the hole firmly now use a square off the head and turn the cam till the screwdriver is a perfect 90%
do this for both camshafts

put hub back on loosely turn the hub clockwise till it stops


take the splined center shaft push inside and turn the hub ccw intill the splines mesh
if you have to move the hub back more than about 5 minutes on a clock take splined shaft out turn it to next tooth and try again.

once it slides in on the intake side push it in till the splines are just barely visible then lock down the hub

for the other exhaust hub judge it from the intake should be about the same depth.

now pat yourself on the back you just timed a S54 without special bmw tool bla bla

the cam timing is controlled by the computer so if you get it close the computer will be happy.The computer sets the cam timing everytime you start the car unless you get to far out then you will get ses light but i never had one by doing it this way.


thanks you guys
Appreciate 0
      01-23-2012, 08:42 PM   #27
onebluemcm
Captain
onebluemcm's Avatar
42
Rep
632
Posts

Drives: '07 Z4MC
Join Date: Apr 2010
Location: Richmond, VA

iTrader: (0)

Quote:
Originally Posted by turbotoy2791 View Post
you dont need the bmw timing tool if you know how to use a square.
There is some videos on youtube of how to take it apart.
I tried it the first time by marking the cams with no success. but now I have no problems timing the cams.
Before you take the hubs completely lose from the cams make sure your on top dead center.

when you go to reinstall stick a 1/4 extension in the crank hole to lock it at tdc make sure its at tdc there is a couple holes but only one tdc
there is a hole in the camshafts find a screwdriver or something that fits inside the hole firmly now use a square off the head and turn the cam till the screwdriver is a perfect 90%
do this for both camshafts

put hub back on loosely turn the hub clockwise till it stops


take the splined center shaft push inside and turn the hub ccw intill the splines mesh
if you have to move the hub back more than about 5 minutes on a clock take splined shaft out turn it to next tooth and try again.

once it slides in on the intake side push it in till the splines are just barely visible then lock down the hub

for the other exhaust hub judge it from the intake should be about the same depth.

now pat yourself on the back you just timed a S54 without special bmw tool bla bla

the cam timing is controlled by the computer so if you get it close the computer will be happy.The computer sets the cam timing everytime you start the car unless you get to far out then you will get ses light but i never had one by doing it this way.


thanks you guys
This is the simpelest explanation of this I've seen yet, and I've been reading about timing an S54 for a long time. Seems legit enough to me from all the other stuff I've read. So, just how many times have you timed an S54 this way?
__________________
<img src=http://i284.photobucket.com/albums/ll30/onebluemcm/RG63_08-1-1.jpg border=0 alt= />
|=.-._.-._.-._.-._.-._.-._.-._.-._.-._.-._.-.=|
Silbergrau A08 / Sepang Brown LSD6 / Carbon Leather 4MY (1 of 3, this combo)
RAC RG63 | Conti EC-DW | GC/Koni-Dinan | Rogue RSM | Arqray | Autosolutions | BMW brace | Pinnacle tint
Appreciate 0
      01-23-2012, 10:27 PM   #28
txz4
Major
txz4's Avatar
59
Rep
1,097
Posts

Drives: 2006 M coupe
Join Date: Oct 2010
Location: san antonio, texas

iTrader: (3)

Quote:
Originally Posted by onebluemcm View Post
This is the simpelest explanation of this I've seen yet, and I've been reading about timing an S54 for a long time. Seems legit enough to me from all the other stuff I've read. So, just how many times have you timed an S54 this way?
Frankly this would scare the shit out of me to time an S54, that being said this info is amazing.
Appreciate 0
      01-24-2012, 08:39 PM   #29
turbotoy2791
300 Maraging hub
1
Rep
11
Posts

Drives: m3
Join Date: Jan 2012
Location: nc

iTrader: (0)

timing

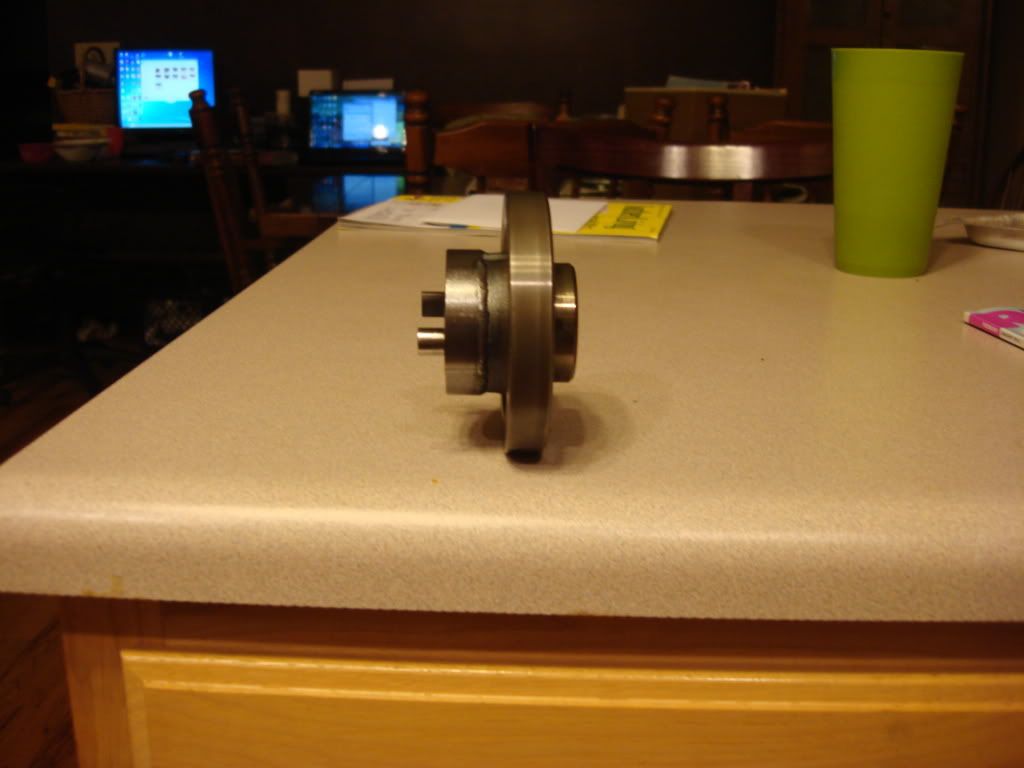
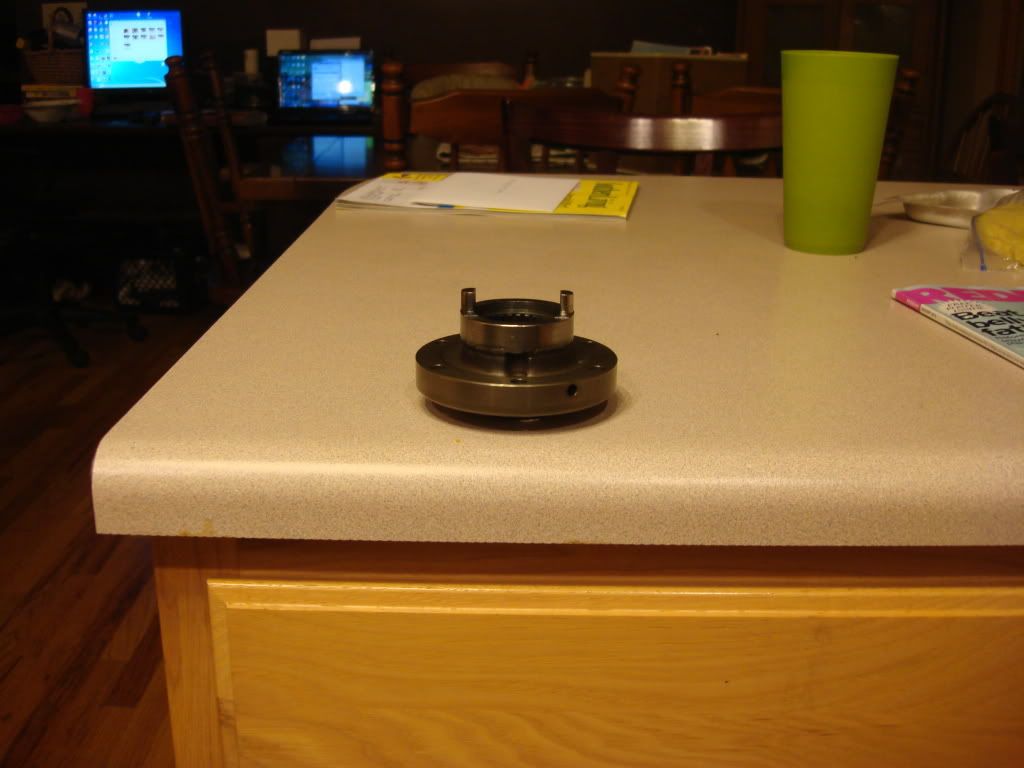
I have timed it twice this way and three times using the mark it before you take it apart way which did not work for me. I am very confident in the screw driver and square. I am going to be doing it pretty soon again for the third time to get pictures of my hub. Also I said square it off the head but you really square it off the tops of the cams since they sit higher than the gasket flange of the head.
Appreciate 0
      02-06-2012, 08:29 PM   #30
turbotoy2791
300 Maraging hub
1
Rep
11
Posts

Drives: m3
Join Date: Jan 2012
Location: nc

iTrader: (0)

new design


Appreciate 0
      02-06-2012, 08:54 PM   #31
inTgr8r
Lieutenant General
inTgr8r's Avatar
Canada
2432
Rep
11,667
Posts

Drives: M2 Comp
Join Date: Mar 2006
Location: Toronto

iTrader: (10)

Quote:
Originally Posted by beta View Post
The shop that I go to said that they had replaced bolts in at least 3 cars and none of them had loose bolts. Not every M has loose vanos bolts, it's probably a small percentage.
IMO, it's only cars that they forgot the locktite
__________________
'21 M2C Hockenheim Silver
'18 718 Cayman S Lava Orange (sold)
'13 E92 M3 Santorini Blue (sold)
'07 Z4 M Coupe Alpine White (sold)
Appreciate 0
      02-07-2012, 08:04 AM   #32
bignosejim
Lieutenant
bignosejim's Avatar
United_States
40
Rep
400
Posts

Drives: 2007 IB M Coupe
Join Date: Oct 2011
Location: DFW

iTrader: (0)

If you look at RealOEM the fillister head screw (part number 07119919965) ended in 04/2006 and was replaced by fillister head screw (07129905536). That is the one with locktite, I believe. That is also the only part number listed under my build date of 12/2006. So if your build date is before 04/2006 then you might have the old screws in your car.
Appreciate 0
      02-07-2012, 09:16 AM   #33
Ron Stygar
Lieutenant
9
Rep
421
Posts

Drives: 2006 Z4 M Coupe
Join Date: Sep 2007
Location: USA

iTrader: (0)

Quote:
Originally Posted by bignosejim View Post
That is also the only part number listed under my build date of 12/2006. So if your build date is before 04/2006 then you might have the old screws in your car.
Penske says 200709. Put the arrow on the NA.

http://www.penskeparts.com/DiagramsR...iagram=11_3004
Appreciate 0
      02-07-2012, 09:18 AM   #34
Huz-Z
Brigadier General
Huz-Z's Avatar
Canada
851
Rep
4,057
Posts

Drives: Z4 3.0si, 328 XDrive, X5 35i
Join Date: Aug 2009
Location: Canada

iTrader: (0)

Pardon me if this is a stupid question. But does this mean that a 2007 or 2008 Z4M should be immune to the dreaded VANOS failure issue?
__________________
Huz-Z


BMW Z4 3.0si Roadster. Montego Blue Metallic. Premium and Sport Package.
Appreciate 0
      02-07-2012, 10:57 AM   #35
chickdr
Lieutenant Colonel
140
Rep
1,991
Posts

Drives: 2006 M Roadster
Join Date: May 2009
Location: Buford, GA

iTrader: (0)

For the issue with the screws backing out - yes. Are you considering switching to an M?
Appreciate 0
      02-07-2012, 11:39 AM   #36
gcochard
Captain
24
Rep
784
Posts

Drives: 2011.5 E90 M3
Join Date: Oct 2010
Location: South OC

iTrader: (2)

Garage List
2011 BMW M3  [0.00]
My build date is 03 2006. I have my first inspection coming up in 500 miles so I'll let everyone know what I find.
Appreciate 0
      02-07-2012, 11:57 AM   #37
Huz-Z
Brigadier General
Huz-Z's Avatar
Canada
851
Rep
4,057
Posts

Drives: Z4 3.0si, 328 XDrive, X5 35i
Join Date: Aug 2009
Location: Canada

iTrader: (0)

Quote:
Originally Posted by chickdr View Post
For the issue with the screws backing out - yes. Are you considering switching to an M?
I came close to doing that last spring actually. I don't have plans to switch right now, but I could be interested if the right car came along at the right price. I think I would find a low mileage Imola Red roadster hard to resist!
__________________
Huz-Z


BMW Z4 3.0si Roadster. Montego Blue Metallic. Premium and Sport Package.
Appreciate 0
      02-07-2012, 12:45 PM   #38
Ron Stygar
Lieutenant
9
Rep
421
Posts

Drives: 2006 Z4 M Coupe
Join Date: Sep 2007
Location: USA

iTrader: (0)

Quote:
Originally Posted by Huz-Z View Post
Pardon me if this is a stupid question. But does this mean that a 2007 or 2008 Z4M should be immune to the dreaded VANOS failure issue?
I have no data showing that.
Both screws are 8.8.

Spend $30 for BMW centernet and look the bulletins and also group 06 in the bulletins.

It could be come from another company.
Appreciate 0
      02-07-2012, 01:10 PM   #39
Swanicyouth
Private
1
Rep
66
Posts

Drives: Z4M
Join Date: Mar 2011
Location: Limerick PA

iTrader: (0)

So, let me make sure I got this correct. To time an S54, the only tool most people need is the cam alignment jig that sits on the top of the head. The purpose of the black electrical box is to remove oil psi from the vanos prior to removal, which can be done by removing the end caps. The jig sets both cams at 90 degrees using a hole in each cam and a rod through the jig. Some people have done it without the jig using a square to ensure the cams are in the correct position. Even if the cams are a little off, the DME can work with it and correct it. This setting of the cams is the only critical step to affect timing. Reinstalling the splined gears that go inside the hub is either done correctly or not, if not you will know it, no special tools required there. Correct?

*** Also, one is able to see/check both exhaust Vanos oil pump tabs by removing just the valve cover and turning the engine; no additional tear down is required... Correct? Thanks!
Appreciate 0
      02-07-2012, 04:41 PM   #40
bignosejim
Lieutenant
bignosejim's Avatar
United_States
40
Rep
400
Posts

Drives: 2007 IB M Coupe
Join Date: Oct 2011
Location: DFW

iTrader: (0)

Quote:
Originally Posted by Swanicyouth View Post
So, let me make sure I got this correct. To time an S54, the only tool most people need is the cam alignment jig that sits on the top of the head. The purpose of the black electrical box is to remove oil psi from the vanos prior to removal, which can be done by removing the end caps. The jig sets both cams at 90 degrees using a hole in each cam and a rod through the jig. Some people have done it without the jig using a square to ensure the cams are in the correct position. Even if the cams are a little off, the DME can work with it and correct it. This setting of the cams is the only critical step to affect timing. Reinstalling the splined gears that go inside the hub is either done correctly or not, if not you will know it, no special tools required there. Correct?

*** Also, one is able to see/check both exhaust Vanos oil pump tabs by removing just the valve cover and turning the engine; no additional tear down is required... Correct? Thanks!
I wouldn't time an S54 without the cam alignment jig and a TDC pin. But I haven't done that yet.

Yes, you can look at the vanos tabs by removing the valve cover and turning the engine. I have some pics of mine here: http://www.zpost.com/forums/showthread.php?t=643901
Appreciate 0
      02-11-2012, 08:28 PM   #41
danlauz
Private First Class
Canada
8
Rep
134
Posts

Drives: z4m 2007+x5 2009+330 cic 2003
Join Date: Jan 2007
Location: canada

iTrader: (0)

I had a dec 2006 mc and,,i had the bolts problems. They had to changed them.
Appreciate 0
      02-22-2012, 11:00 PM   #42
turbotoy2791
300 Maraging hub
1
Rep
11
Posts

Drives: m3
Join Date: Jan 2012
Location: nc

iTrader: (0)

Quote:
Originally Posted by Swanicyouth View Post
So, let me make sure I got this correct. To time an S54, the only tool most people need is the cam alignment jig that sits on the top of the head. The purpose of the black electrical box is to remove oil psi from the vanos prior to removal, which can be done by removing the end caps. The jig sets both cams at 90 degrees using a hole in each cam and a rod through the jig. Some people have done it without the jig using a square to ensure the cams are in the correct position. Even if the cams are a little off, the DME can work with it and correct it. This setting of the cams is the only critical step to affect timing. Reinstalling the splined gears that go inside the hub is either done correctly or not, if not you will know it, no special tools required there. Correct?

*** Also, one is able to see/check both exhaust Vanos oil pump tabs by removing just the valve cover and turning the engine; no additional tear down is required... Correct? Thanks!
You are correct on all

s54 timing
http://www.mediafire.com/?bmd3j2ievwji0aw
here is a video on setting the splined shafts
http://www.youtube.com/watch?v=QVFT1JGqJrA

Last edited by turbotoy2791; 02-23-2012 at 08:47 PM..
Appreciate 0
Post Reply

Bookmarks


Posting Rules
You may not post new threads
You may not post replies
You may not post attachments
You may not edit your posts

BB code is On
Smilies are On
[IMG] code is On
HTML code is Off


All times are GMT -5. The time now is 09:21 PM.


zpost
Powered by vBulletin® Version 3.8.11
Copyright ©2000 - 2024, vBulletin Solutions Inc.
1Addicts.com, BIMMERPOST.com, E90Post.com, F30Post.com, M3Post.com, ZPost.com, 5Post.com, 6Post.com, 7Post.com, XBimmers.com logo and trademark are properties of BIMMERPOST