

| BMW Garage | BMW Meets | Register | Today's Posts | Search |
|
|
|
 SUPPORT ZPOST BY DOING YOUR TIRERACK SHOPPING FROM THIS BANNER, THANKS! |
|||||||||
Post Reply |
|
|
Thread Tools | Search this Thread |
| 10-07-2008, 05:57 PM | #1 |
|
Lieutenant General
 2280
Rep 12,565
Posts
Drives: Z4 M, X5, GX460
Join Date: Apr 2008
Location: CT
iTrader: (99)
Garage List F15 X5 xDrive35i [8.75]
E86 Z4 M [10.00] F10 550i (Retired) [9.17] F25 X3 xDrive35i (R ... [9.43] E82 135is (Retired) [9.50] E85 Z4 M (Retired) [9.41] E90 328i xDrive (Re ... [9.25] E86 Z4 3.0si (Retired) [9.20] |
OEM CF Lip
Sneak peak...
 (taken with iphone) The install was fairly easy. There's a writeup on either e90 or 1-series forums and it was pretty helpful. But for anyone else considering doing this mod, I would say definitely have a friend help out. I did mine alone at night (so the glue could dry overnight) and I noticed the next morning upon removing the painters tape that the right side was a few cm or two off. It's not noticeable at all unless you went out of your way to check both left and right sides but I'm anal like that. The write-ups are pretty detailed but in case you were wondering basic steps involved. Sorry, no photos but you can refer to the other DIY guide and use this as a supplement. 1. Sand down CF lip (sandpaper provided with Betalink adhesive packaging). I probably spent a good hour doing so and got more sandpaper from the garage. 2. Clean off lip with the betalink cleaning solution. Also clean off the trunk lip with the same. Wait till both dry. 3. Put the lip on the trunk to see how it'll lineup. Cover the surrounding areas of the car with painters tape. Then cover the top side of the lip in painters tape as well. 4. Then measure the lip and find the midpoint. With a sharpie, draw a line down the middle (it'll be on the blue tape so its fine) so you know where it should line respective to the rear BMW emblem. 5. Use GLOVES GLOVES GLOVES, and make sure you have alot of extra ones as well. Latex is probably best. The adhesive can get real messy to work with so if you find the gloves sticking together or your hands aren't as free, switch out for another pair. The cf lip itself is pretty hollow so before you apply the adhesive to the inside/hollow part of the lip, I'd apply the outside first (where contact with trunk is made). Don't apply to much b/c it'll inevitably come squeezing out. And when you do apply the adhesive, I'd lean more towards applying towards the inner section of the trim so that when you push down later, the adhesive wall squeeze towards the direction of the hollow middle not the outside of the lip. 6. Have a friend help you gently place the lip down. Use the midpoint you marked before as a refenence as to where the middle is. That's the easy part. Now the "hard" part... you'll probably want the lip to stick out as far or flush with the trunk as possible. This is where I minorly F'd up b/c I did this myself but have you and your friend check that both sides are flush at the same point. You'd think it's fairly simple but at this point, since the lip is covered up in blue tape, it's hard to gauge where exactly the lip is sitting. 7. As you gently push down on the lip the adhesive will start coming out from the bottom. With the spatula and cleaning solution provided, start peeling off the excess glue. The solution helps in when the glue dries up, the solution will make it very easy for you to peel it off. When it does dry, the texture becomes this rubber like material that you can almost peel off. 8. Once you're satisfied, and you've removed the majority of excess glue, push down on the lip with your body weight while having your friend duct tape the lip down to the trunk. The other DIYs suggest using clamps on each end of the lip but that's not really possible for our hatches. So use a crapload of duct tape. And again, ensure that it's sitting flush with the trunk. Now that I think about it, I think this is where the lip might've moved. I know it was flush before but when you push down, it might slide a cm or two b/c it slides and I didn't recheck at this point! 9. Let it sit and dry for 4-8 hours (I think 5 minimum is suggested). Also you should ensure temps are bet 60 and 90 degrees. 10. Start peeling away the duct tape as well as blue tape on both car and lip. You'll see that excess glue still managed to sneak onto the car. Not a big deal, just use the spatula and solution again and peel away. If you do it carefully, you shouldn't scratch your car but just to be safe, I'd give the car a nice coating of wax in 2 days (they say to not wash the car for at least 48hrs) All in all, I'd say 2hrs prep, 1 hr finishing touches after drying. Mine came out 9.8/10 but given that I didn't pay $300 for some body shop or dealer to do it, I'm pretty satisifed. I just your install comes out a perfect 10/10 by learning from my errors 
__________________
Follow
Last edited by 3002 tii; 10-08-2008 at 07:56 AM.. |
| 10-07-2008, 09:15 PM | #3 |
|
Major
 
55
Rep 1,224
Posts |
Very nice.
When you've had a chance to shoot some pics, you'll have to show off your newest mod. Good info on the install. I'm thinking seriously about one of these. Thanks again. |
|
Appreciate
0
|
| 10-23-2008, 03:42 PM | #5 |
|
Lieutenant General
2280
Rep 12,565
Posts
Drives: Z4 M, X5, GX460
Join Date: Apr 2008
Location: CT
iTrader: (99)
Garage List F15 X5 xDrive35i [8.75]
E86 Z4 M [10.00] F10 550i (Retired) [9.17] F25 X3 xDrive35i (R ... [9.43] E82 135is (Retired) [9.50] E85 Z4 M (Retired) [9.41] E90 328i xDrive (Re ... [9.25] E86 Z4 3.0si (Retired) [9.20] |
   
__________________
Follow
|
|
Appreciate
0
|
| 10-23-2008, 09:01 PM | #6 |
|
Major

88
Rep 1,090
Posts |
any non close up pics?
__________________
135i N54 manual
MR-S with a 2zz swap and mods Sold EVO X MR - Phantom Black - Ti Exhaust - Ti UICP - AQM Intake - Sold Z4 M Coupe - H&R - RE Diablo - RPi - Tekarbon - Sold |
|
Appreciate
0
|
| 10-24-2008, 08:23 AM | #9 |
|
Lieutenant General
2280
Rep 12,565
Posts
Drives: Z4 M, X5, GX460
Join Date: Apr 2008
Location: CT
iTrader: (99)
Garage List F15 X5 xDrive35i [8.75]
E86 Z4 M [10.00] F10 550i (Retired) [9.17] F25 X3 xDrive35i (R ... [9.43] E82 135is (Retired) [9.50] E85 Z4 M (Retired) [9.41] E90 328i xDrive (Re ... [9.25] E86 Z4 3.0si (Retired) [9.20] |
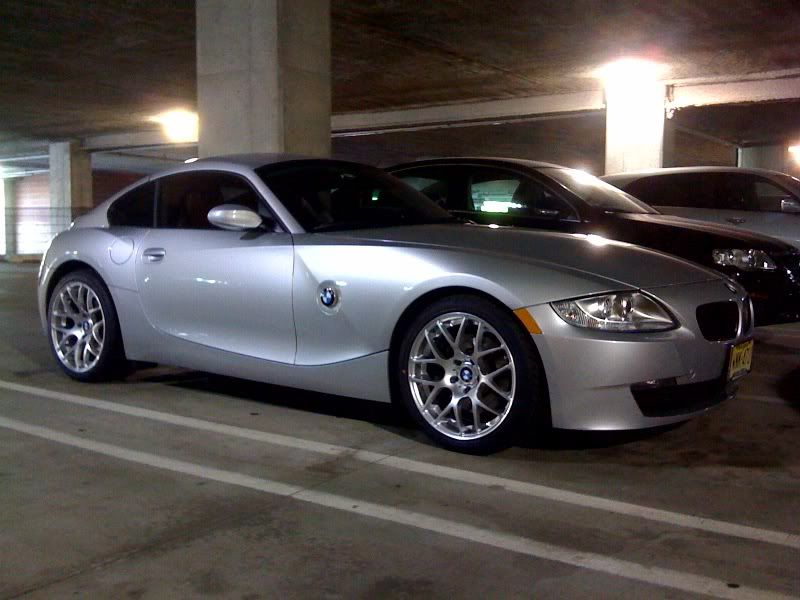
i'll try to snap some photos from away but here's one more i took the other day:

__________________
Follow
|
|
Appreciate
0
|
| 10-24-2008, 08:52 PM | #10 |
|
Major
88
Rep 1,090
Posts |
lol ur number plates almost read "WANK 4 U"
spoiler looks goooood
__________________
135i N54 manual
MR-S with a 2zz swap and mods Sold EVO X MR - Phantom Black - Ti Exhaust - Ti UICP - AQM Intake - Sold Z4 M Coupe - H&R - RE Diablo - RPi - Tekarbon - Sold |
|
Appreciate
0
|
Post Reply |
| Bookmarks |
|
|


