| BMW Garage | BMW Meets | Register | Search | Today's Posts | Mark Forums Read |
 |
|
|
 SUPPORT ZPOST BY DOING YOUR TIRERACK SHOPPING FROM THIS BANNER, THANKS! |
|||||||||
Post Reply |
|
|
Thread Tools | Search this Thread |
| 01-30-2013, 10:09 AM | #45 |
|
Second Lieutenant
 25
Rep 296
Posts |
Blast from the past, Don't know if others have seen this or not...
I am going to do it and switch over to ///M roundels and debage the sides!
__________________
 2007 Z4MC, 1" drop H&R Springs, Evolve Tunning, Headers, K&N Filter, RPI scoop, Red top high energy coils, UUC Red Poly mounts (none bolt-through), UUC Lightweight Flywheel with Organic Clutch and a custom exhaust with just one AeroTurbine muffler. 2007 Z4MC, 1" drop H&R Springs, Evolve Tunning, Headers, K&N Filter, RPI scoop, Red top high energy coils, UUC Red Poly mounts (none bolt-through), UUC Lightweight Flywheel with Organic Clutch and a custom exhaust with just one AeroTurbine muffler. |
|
Appreciate
0
|
| 01-30-2013, 01:06 PM | #46 |
|
First Lieutenant
  
16
Rep 385
Posts |
-Make sure you account for the rotation fit of the marker base so your Ms will end up level with the centerline of the wheelbase (as opposed to actual level).
|
|
Appreciate
0
|
| 02-03-2013, 10:37 AM | #47 |
|
6 of Diamonds (ret)

82
Rep 566
Posts |
Here's mine - Still looks good badged- with a little help!
__________________
 2007 Z4Si(gone) 2007 Z4Si(gone)Couple E30 Verts (DD) 2003 330i 2011 E93 335is - current fav |
|
Appreciate
0
|
| 02-11-2013, 06:12 PM | #48 |
|
Enlisted Member
 1
Rep 31
Posts |
Great idea for a mod! With a darker car, might be interesting to smoke tint the clear plastic.. I may have to give it a shot on my interlaggos blue z4m
|
|
Appreciate
0
|
| 02-13-2013, 05:12 PM | #49 |
|
Second Lieutenant
 11
Rep 228
Posts |
Just did this last week - fairly easy with a dremel and the scoring method discussed in previous pages... tried hacksaw and just had trouble holding down the roundel, keeping the line straight etc... Precision is important but should be OVERSTATED as there's probably 1/8" that lives inside the fender, there's room for a certain level of error
 |
|
Appreciate
0
|
| 02-18-2013, 10:01 PM | #50 | |
|
6 of Diamonds (ret)

82
Rep 566
Posts |
Quote:
__________________
 2007 Z4Si(gone) 2007 Z4Si(gone)Couple E30 Verts (DD) 2003 330i 2011 E93 335is - current fav |
|
|
Appreciate
0
|
| 02-19-2013, 09:13 AM | #51 |
|
Major
 78
Rep 1,443
Posts |
I haven't had the opportunity to pull things apart yet but I intend to do this. How have you guys been going about making sure you've got the roundel level before gluing and replacing it? Is it possible to reassemble everything then glue the roundel on once everything is back together?
__________________
 |
|
Appreciate
0
|
| 02-23-2013, 11:24 AM | #52 |
|
First Lieutenant
  
23
Rep 347
Posts
Drives: 2006 BMW M COUPE
Join Date: Dec 2008
Location: Charlottetown PEI, Canada
|
I did this last night in 20 minutes AFTER reading all the posts. Mark with a felt pen on the edges where the lens is a different shape near the light. I also marked where the top of the badge is - didn't remove it. Can also mark where the cross on the badge goes - all helps line up things after.
Mark cut line where you want it on the perimeter of the lens - I actually allowed a little more space because after you cut the lens, you remove what is left on the light/mounting ring and there is a small indent that the lens sits into originally. This actually gives you more surface area for the bonding agent - I used a 5 minute epoxy that was safe for plastic - worked fine and you have plenty of time to work aligning the badge part up. I placed the badge side on a crumpled up cloth level and then put the epoxy around the edges. Lowered the lens on to the flat area and rotated until ALL the marks were lined up. Don't really need any clamps or weight on it but you can - if it squirts out between wipe it off cause you aint gonna later! One it sets put the light back in - I actually have an LED bulb there that is a LOT smaller than the original - white in fact so lots of room. You can put some silicone spray on the rubber gasket and the tabs and it will be glued strongly enough to turn the light holder back into the piece on the car.IF you are worried that the lihjr housing will separate - pull out the mounting circle - feed the wire and light through - turn the hamburger in the fitting from the inside using the plastic tubes that stick up and then put it back in one piece. Not sure once this is done if it gives much light in the reverse direction for cars coming up on your rear quarter BUT it sure looks a lot better.
__________________
2006 M COUPE - 380 total production, 1 of 40Imola Red produced for NA , ESS 455 Supercharger, Speedhut Gauges, VPM CLS wheels, 19" Hancooks, Stromung Exhaust, Carbon fibre accessories and black and white badging,
 |
|
Appreciate
0
|
| 02-23-2013, 04:02 PM | #53 | |
|
Second Lieutenant
 11
Rep 228
Posts |
Quote:
And yes to the earlier post putting some sandpaper on the bench and just rubbing the edge against it until things get level is a prefectly fine approach, that's what I did. |
|
|
Appreciate
0
|
| 02-23-2013, 04:52 PM | #54 |
|
First Lieutenant
  
23
Rep 347
Posts
Drives: 2006 BMW M COUPE
Join Date: Dec 2008
Location: Charlottetown PEI, Canada
|
YES SIR that works as well - I left the roundel on as I had replaced the stock one with black and white and couldn't get it off if I wanted to

__________________
2006 M COUPE - 380 total production, 1 of 40Imola Red produced for NA , ESS 455 Supercharger, Speedhut Gauges, VPM CLS wheels, 19" Hancooks, Stromung Exhaust, Carbon fibre accessories and black and white badging,
 |
|
Appreciate
0
|
| 02-26-2013, 06:29 AM | #55 |
|
Enlisted Member
 1
Rep 31
Posts |
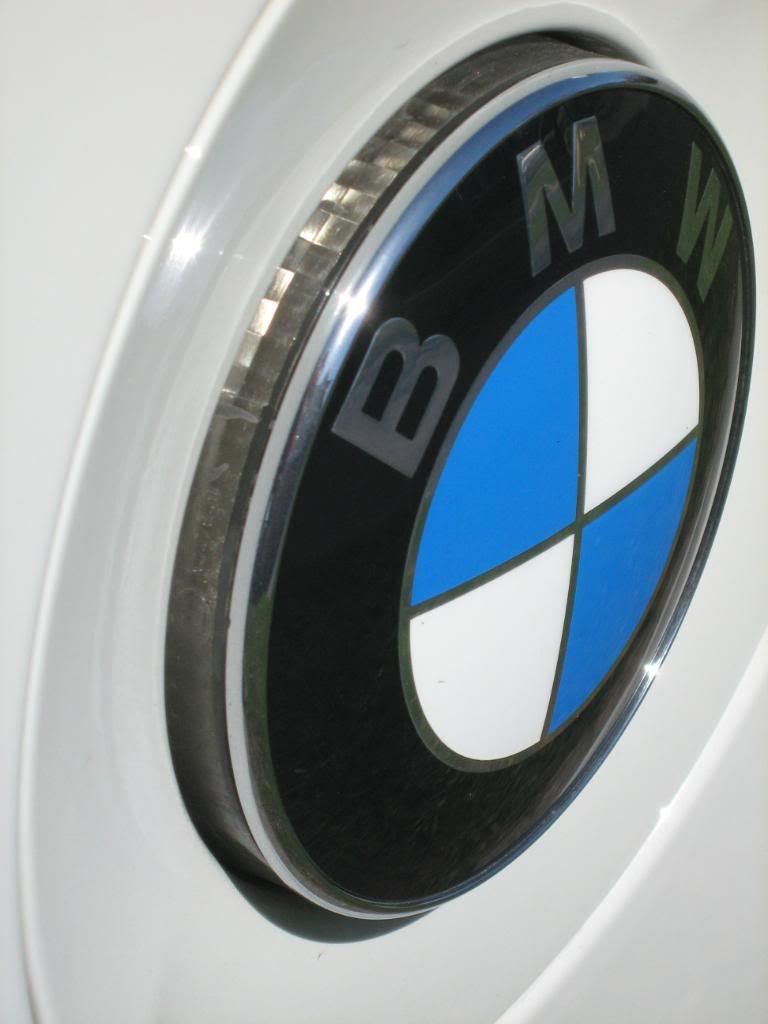
Finally got around to doing this mod. Thanks to the OP for the great idea. I left the roundel on as others mentioned, and also preserved a tab when cutting down the plastic. Wasn't too difficult with a dremel. Finally, sprayed the inside of the plastic with VHT niteshades to give it a slight tint.
Here are pictures after modification:  And on the car:  |
|
Appreciate
0
|
| 02-26-2013, 09:52 AM | #56 | |
|
Major
 
55
Rep 1,224
Posts |
Quote:
 Did mine several years ago and left them clear to go with my AW body color and clear Euro reflectors. Did mine several years ago and left them clear to go with my AW body color and clear Euro reflectors.
__________________
If you can't take the time to teach a kid something good, someone will take the time to teach them something bad.
|
|
|
Appreciate
0
|
| 01-05-2014, 08:43 PM | #57 |
|
"The Midas Touch"
519
Rep 1,055
Posts
Drives: F87 LBB ///M2
Join Date: Aug 2007
Location: Seattle, WA
|
Does anyone have tips on how to separate glue o the the stock hamburger to open it up? Would love some feedback. Thanks
|
|
Appreciate
0
|
| 01-05-2014, 11:09 PM | #58 |
|
Private
 6
Rep 65
Posts
Drives: 08 3.0si Artic White with Red
Join Date: Jun 2013
Location: Whitby Ontario Canada
|
Me Too !
 Actually this was one of my first mods and I used the slice in half with a hacksaw method. Remaining lens that was attached to the base 'snapped' off easily using a pair of pliers. You can cut perpendicular relief cuts if you are nervous. Glued everything back together with JB Weld Epoxy. Its been almost 3 years and so far so good. |
|
Appreciate
0
|
| 01-05-2014, 11:20 PM | #59 | |
|
Private
 6
Rep 65
Posts
Drives: 08 3.0si Artic White with Red
Join Date: Jun 2013
Location: Whitby Ontario Canada
|
Quote:
I left the rondel attached to the lens and discarded the portion attached to the base. As mentioned you have to make a mark on the lens with a sharpie to make sure you align everything when you glue it back together. Even with half the lens gone, the stock bulb fit perfectly. I tried to replace the stock amber bulbs with white leds and those did present clearance problems with the leds I bought. |
|
|
Appreciate
0
|
| 01-05-2014, 11:24 PM | #60 | ||
|
"The Midas Touch"
519
Rep 1,055
Posts
Drives: F87 LBB ///M2
Join Date: Aug 2007
Location: Seattle, WA
|
Quote:
|
||
|
Appreciate
0
|
| 01-06-2014, 01:50 PM | #61 |
|
Private
 6
Rep 65
Posts
Drives: 08 3.0si Artic White with Red
Join Date: Jun 2013
Location: Whitby Ontario Canada
|
Yup.
Carefully cut with a hack saw, just scoring a groove around the circumference, guided by the edge of the masking tape. The clear lens plastic is quite brittle and once the two halves were 'parted" the remaining lens that was attached to the base easily snapped off using a common pair of pliers. As mentioned, if you are nervous, relief cuts through the waste lens at several points can direct the breaks. A piece of sand paper attached to a flat surface, trues up both lens and base for the epoxy. Not sure why one would fuss over a 'locating notch". Your 'alignment mark' via a sharpie or small scratch will have the rondel properly aligned. Easy Peasey and you will love the results. |
|
Appreciate
0
|
| 01-06-2014, 02:03 PM | #62 |
|
Lieutenant General
   
2426
Rep 11,667
Posts |
^WHS....
...If you want to go ultra slim. On the ones I did for my old roadster, I drilled out part of the plastic (behind the Roundel) to provide a little more clearance for the bulb.
__________________
'21 M2C Hockenheim Silver
'18 718 Cayman S Lava Orange (sold) '13 E92 M3 Santorini Blue (sold) '07 Z4 M Coupe Alpine White (sold) |
|
Appreciate
0
|
Post Reply |
| Bookmarks |
| Thread Tools | Search this Thread |
|
|