

| BMW Garage | BMW Meets | Register | Today's Posts | Search |
|
|
|
 SUPPORT ZPOST BY DOING YOUR TIRERACK SHOPPING FROM THIS BANNER, THANKS! |
|||||||||
Post Reply |
|
|
Thread Tools | Search this Thread |
| 09-21-2017, 04:42 AM | #23 |
|
Private First Class
 
93
Rep 133
Posts |
Ever since i got my car, it had an issue of a slight hesitation which occurs for a split second when you press the accelerator and then she starts going normally.
The following did not have any effect on this issue: > New Spark Plugs and service > Injector Cleaner > Octane Booster > Throttle adaptations So last week i managed to get some time to have a look, Decided i'd pull off the Intake Plenum and ICV and Clean them up and fit it back... Issue resolved, no more hesitation... Car pulls strong through out the Revs. Some pics: Getting Started  Plenum off   Dirty/Gunky/Oily  Filthy ICV  Suckers out for cleaning  Stripping ICV Piping for cleaning  After a bit of Cleaning    ICV Cleaned, reassembled and fitted  Intake fitted back and ready for wash time..  Gave it a wash and called it a day...           
__________________
|
|
Appreciate
1
Vanne1623.50 |
| 09-21-2017, 04:43 AM | #24 |
|
Private First Class
93
Rep 133
Posts |
This car has been performing so well since the Injector, throttle body, Intake and MAF cleaning was done. The hesitation when you touch the accelerator has completely gone, power is available instantly now.
I had done an Oil change in April this year but since I had 10L of Liqui Moly racetech Oil and Antifriction Additive in the storeroom, i decided it would be good to do a quick oil change just incase any Throttlebody Cleaner/Carb Cleaner or injector Cleaner got in the oil and contaminated it in any way. I went to BMW and got a new Oil Filter which was fairly cheap (R275). And so the oil change began:  Old filter (Put in on 10 April 17 @ 112000km's)  Looking very Dirty for 2000km's    Swapping out the old Seals for new ones  New Filter marked and ready to go in   Oil Filter and Oil added, everything cleaned and closed up Checked oil level and all was good Started it up and it idle'd smooth... We then decided to use the Z to KZN, on the open road its a pleasure to drive... Power available on a Tap of the accelerator, Handled really well on the Twisties... at that point of travelling to KZN, the diff had done about 1000km's and settled in nicely, no funny sounds/vibrations.... the drvietrain was smooth as butter... at the coast this car was an absolute nut job, Traction off and sport on meant you end up drifting everywhere lol... even with some sideways action, the diff really performed well.. I really enjoyed the power it had down there... Some pics on the way:    While I was down in Durbs, I didn't wash the car for the week and since I don't use car wash's as they scratch the paint, I decided to leave it dirty and then clean it properly when I got back... But Damn it was filthy when I got back home           [hr] Started with the wheels and exhaust... Wheels sprayed with APC to break down the dust and dirt then gave it a nice good scrubbing..      Exhaust back boxes and tail pipes was also filthy   Had to be Sprayed with APC and then scrubbed... Now looking clean again...   I then washed the car and Damn, it was still dirty :rage:      I ended up washing it again and at that point decided with the rainy season coming soon it would be a good idea to detail the paint again so it will be nice and protected when the rains come... Entire car was Clayed to remove all dirt and contaminants in the clear coat..    [hr] Once the paint was smooth and clean, I brought out the Rotary Polisher with Medium Cut pad and Menzerna Medium cut polish to cut the top layer and remove swirls/scratches/marks. It took me Between 15-20 Hrs just to machine Polish for paint correction..     Once the Paint correction was completed, it was then machine polished again with Super Resin Polish on a softer white polishing pad... this took another 4-6 hrs After the super resin Polish, the entire car was Glazed with Poor Boys Dark show car Glaze, also applied by machine with a soft finishing pad... Took another 4-6 hrs... Extreme top coat Sealant was applied by hand and left to cure for a few hours.... another 2 hrs Lastly the entire car was waxed by hand using Dodo Juice wax which i imported back in 2009 and still going strong. another 2 hrs. Wax on    Wax Off     The Paint work is now deep black and full of gloss... I am happy with the outcome Tire Paint touch ups where needed as well.   Excuse the poor quality cellphone pics,its more for my file All in all i've spent 5 days on cleaning/polishing the car so far and I'm still busy so i haven't moved it out the garage into the sun to take some better shots... Still to do: > Clean and polish all door Jams, boot and bonnet areas also... > Treat all rubbers with rubber renovator to soften and protect > Finish up Tire Paint touch up on the rear left tire. > Clean interior > Engine bay was washed, just need to apply dressing to plastics and rubbers. Hopefully i can get around to some of these in the evenings or over the weekend... will update as progress is made..
__________________
|
|
Appreciate
5
|
| 10-02-2017, 07:31 AM | #27 |
|
Captain
 370
Rep 870
Posts
Drives: 2006 BMW Z4M Roadster
Join Date: Oct 2015
Location: NC
|
I was a away for awhile working on a project and missed your initial post. I just read the entire thread. Wow! Great job. And who knew the OEM exhaust would polish up so nicely.
A very late welcome to the forum! Salty
__________________
2006 BMW Z4M Interlagos Blue/Black
Aux Port|LED Interior|LED Strip Trunk|Underseat First Aid Box|Stubby Antenna|Intravee II|BMW Oil Change Kit|Top Down Side Panels|Vibra Technics Engine Mounts|Rogue Trans Mounts|Engine Mount Bolts Upgrade|RS Windblocker|Euro Front Plate|M5 Illum Shift Knob|Supersprint Powerloop Exhaust|Gruppe-M Intake|RPI Scoop|Black Grills|19x8.5 ET35 F 19x9.5 ET22 R Sportline 8s PSS| Besian Vanos|CDV Delete |
|
Appreciate
1
ZAR4MC93.00 |
| 10-03-2017, 02:04 AM | #30 | |
|
Private First Class
93
Rep 133
Posts |
Quote:
__________________
|
|
|
Appreciate
0
|
| 10-03-2017, 02:16 AM | #31 | |
|
Private First Class
93
Rep 133
Posts |
Quote:
These are the steps/products i used: 1. Wash Wheels with Rim Cleaner and APC (all purpose Cleaner) 2. Wash car with Sonax Shampoo 3. Calyed with AutoGlym Clay and Clay Bar lube 4. Polish with Menzerna Medium Cut polish and Medium Cutting Pad. (remove swirls and light scratches) 5. Polish with AutoGlym Super Resign Polish (Super Gloss and contains fillers to fill in some of the scratches after the cutting step: 4) 6. Applied Poor Boys dark show car glaze (Gloss and definition  ) )7. Applied Sealant - AutoGlym extreme top coat sealant to lock in all that good stuff from steps 2 - 6. 8. topped off with some Dodo Juice Rubbish boys carnuba wax that i imported from the US in 2008. (best wax i've used, and lasts long... still have half the tub and its almost 10 years  ) )9. Tires dressed with Mothers Reflections Tyre and Bumper Gel 10. Plastics (grills, Engine bay) threated with AutoGlym Bumper and tire dressing spray 11. all rubbers (doors, windows, hood, trunk) was treated with Gummi Pledge and are soft and treated against hardening/cracking... also helps eleminate wind noise on the door seals. Sorry no links, but you can google them and you should find it in your country.
__________________
|
|
|
Appreciate
3
|
| 10-04-2017, 04:41 PM | #32 | |
|
Private First Class
70
Rep 188
Posts |
Quote:
Do you use any special equipment polishers of the fillers? |
|
|
Appreciate
0
|
| 10-09-2017, 05:32 AM | #33 | |
|
Private First Class
93
Rep 133
Posts |
Quote:
__________________
|
|
|
Appreciate
0
|
| 10-09-2017, 02:49 PM | #34 |
|
Major General
 
424
Rep 5,329
Posts |
awesome pics, but damnnnnnnnnn I'm so suprised how rough the step is to the head from the throttle bodies, that must disturb air flow, some port matching here would actually be beneficial, next time i get the head off this car I'm going to get mine done for sure.
__________________
Z4MR VT2 - Clubsport build.
Multi award winning Detailing | Wrap | PPF specialists UK based - www.topwrapz.com |
|
Appreciate
1
ZAR4MC93.00 |
| 10-09-2017, 03:49 PM | #35 |
|
Major
 
226
Rep 1,130
Posts
Drives: '11 E92 328i LCI & '06 Z4MR
Join Date: Jun 2014
Location: San Juan TX
|
Originally, I wanted a black Z4MC. I ended up settling for a black Z4MR. Then I decided I wanted a IB Z4MC, but seeing all these pictures makes me want a car exactly just like yours all over again!
__________________
2014 BMW X5 Sdrive35i F15
2011 BMW 328i E92 LCI 2006 BMW Z4 M Roadster E85 2013 BMW S1000RR K46 R.I.P.  1998 BMW Z3 Roadster 1.9L E36 SOLD |
|
Appreciate
1
ZAR4MC93.00 |
| 11-25-2017, 12:47 AM | #36 |
|
Down Under!!

1624
Rep 4,296
Posts |
Wow man, did you drive through a locust plague on your trip? that is the one thing about black though, shows dirt like nothing else does,
 but when its clean and shiny.... but when its clean and shiny.... Great effort mate, i get to Joburg quite a lot, next time i am there ill pm you, id love to see the car. Only other Z4MC I've seen in JBurg was a silver one, though it hadn't been well locked after. Excellent work mate, your seats came out great too 
__________________
2007 EuroSpec Z4///MC - Building/Developing Z4 GT3
Powered by  |
|
Appreciate
0
|
| 11-25-2017, 02:38 AM | #37 | |
|
Private First Class
93
Rep 133
Posts |
Quote:
LoL the bugs on the 1200km road trip are not to be taken lightly  Definitely hit me with a PM if you in JoBurg, if im around it would be nice to meet up... hopefully one day i'd be that side to come see your's and the M culture that side.. 
__________________
|
|
|
Appreciate
0
|
| 12-02-2017, 07:25 PM | #38 |
|
Brigadier General

2937
Rep 3,286
Posts
Drives: 2002 M5;2007 M Coupe;2020 M2C
Join Date: Jul 2011
Location: Tucson
|
Just seeing this thread for the first time...respect on the renewal of the car!
__________________
2020 F87 M2C Hockenheim Silver/MT
2002 E39 M5 Sterling Gray/Caramel 2007 E86 Z4M Coupe Silver Gray/Black 2021 Kia Telluride (hauler) 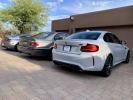 |
|
Appreciate
1
ZAR4MC93.00 |
| 05-07-2018, 03:16 PM | #39 |
|
Private First Class
93
Rep 133
Posts |
Got some Updates on this thread..
New ZHP Knob  Stock Knob - mind the cables, i couldn't wait to remove it.   New Knob Fitted   this thing made a world of a difference.. Now onto the BC Racing Coilovers, the original plan was to fit them while replacing all other suspension components like control arms, tie rods, bushes.ect but I couldn't wait for all the other suspension components to arrive so i fitted the BC's quickly yesterday morning... Install time for front and back... 45min-1hr.... Time to set them up, the rest of the day and atleast another 3 hours this morning. Fitting them was very straight forward 7 bolts in the front, 3 at the rear... Setting them took a sh!t load of time with Pen, paper, Measuring tape, and jacking the car up and down about 10 times while taking it out for a few test drives then coming back jacking setting lowering measuring driving jacking measuring setting driving...on and on and on but eventually i got it pretty good and my alignment is still on point. I had little expectation for these Coilovers at the start but they have impressed me so much this far. I chose to go with Rubber mounts instead of solid/pillowball top mounts and the ride is so good, i was expecting it to be hard and bouncy but its not far off from stock.. after setting everything and all the test runs, i took it for a mad drive on a pvt track  it handles and brakes way way better than OEM... even with my finished rear tires it now has much more traction at the rear. i'm very happy with them.. i will replace the rest of the suspension components in the new year and get the properly balanced and aligned... it handles and brakes way way better than OEM... even with my finished rear tires it now has much more traction at the rear. i'm very happy with them.. i will replace the rest of the suspension components in the new year and get the properly balanced and aligned...    OEM vs BC Rears  OEM vs BC Fronts  OEM Rear  BC Rear  OEM  BC  [/quote]
__________________
|
|
Appreciate
0
|
| 05-07-2018, 03:21 PM | #40 |
|
Private First Class
93
Rep 133
Posts |
My Rims started to look old and tired so i pulled them off to paint them the right way... with good old fashioned Base and Clear coat...
See,  Since i put down like 7 coats on the plastic shit (2 base, 2 Foliatec, 3 Clear) it was kind of thick enough to peel off the front..  but the inside of the rim was a mission, it was impossible to peel off. So i had to use Thinners..  One of the rims had some real bad curb rash which was highlighted by the black plastdip.  so i Decided to repair all the curb rash while i was at it...  Sanded down and ready to wash  Masked and ready for Paint... hopefully today if the weather allows...  So then I painted the rims, came out really nice... Base coat applied  Clear coat applied  The finish straight off the gun.  Rims fitted to the car    Happy with the outcome, loads of gloss and way more durable than the plastic dip and foliatec spray film.
__________________
|
|
Appreciate
1
Mirko182.00 |
| 05-07-2018, 03:23 PM | #41 |
|
Private First Class
93
Rep 133
Posts |
Registered my Go Kart for a track day on a Kart Track and then saw that there will be racing regardless rain or no rain... so in order to make sure i dont end up in the bush, i needed to make some adjustments. lower and stiffer..
Wheels up and out  Front suspension  Getting lower  Rear Suspension  Some measurements  Went for a test drive and came back... Rear too hard, need to adjust damper settings.  Eventually found that sweet spot i was looking for...then.. Next up, new Rear Tires... as these just made driving fun but didn't help much with traction..  2 New rear tires were fitted and then lastly to fine tune the alignment...   and i'm good to go... 
__________________
|
|
Appreciate
0
|
| 05-07-2018, 03:25 PM | #42 |
|
Private First Class
93
Rep 133
Posts |
Below are the Pics from the VWCSA Time Attack event at Laserfiche Raceway in South africa back in Feb this year. Loads of nice cars, very well organized event with lots of track time for everyone...
Traction off, Sport on.... it was an experience of note...      
__________________
|
|
Appreciate
0
|
| 05-07-2018, 03:27 PM | #43 |
|
Private First Class
93
Rep 133
Posts |
I haven't driven the car since the Track day as i wanted to attend to some things first... This weekend i managed to get some time to go in the garage and play a bit...
First issue to address: Replace Bumper Brackets as someone clipped my car in the parking lot and the front left bracket that holds the bumper to the fender broke... which caused it to move slightly at high speeds so as an interim fix i just duct taped it at the Track... Any how I decided to replace both left and right brackets to ensure a nice snug fit... so i had to start by jacking up the car and putting it on stands then to strip the front end..  New vs old brackets  New Bracket fitted  Changed the colour of this brace while i was in there   Front end Back on and Buttoned up...  Then i moved onto the Service/Maintenance and made this little reminder as the car was standing for 2 weeks..  Changed plugs as these look tired for only 13000km's... Octane Booster taking its toll here..  Pulled the old oil filter  and got the new one ready to go in   Then added some additive and filled up with LM10w60 oil lastly since i lowered the car so much for the track, i think one of the jack pads got caught somewhere and came off... so i was using a piece of wood for a few days until i got the replacement and fitted it...   Then i raised the suspension a bit (10mm in front and 18mm rear), fitted wheels back, put the car down on the ground... Topped up oil to required level and went for a test drive... All smooth and enjoyable... ready for action!! I still need to respray my front bumper in sapphire black metallic as it has alot of road rash and scuffs on the lower fangs, i have already purchased the colour matched paint, primer, filler, harders, clear coat,guide coat, sanding blocks, sanding papers, Prepsol and everything else that's required to do the job properly so I just need to make time to prep before painting as the prep work takes so much of time and effort it looks like i will have to put that off until later in the year.
__________________
|
|
Appreciate
0
|
| 05-07-2018, 04:20 PM | #44 |
|
Private First Class
93
Rep 133
Posts |
Not much happened since my last update as i haven't driven the car much but last week i was able to go in the garage and hook up the big charger so while that was happening we coded ///M Track mode from the M3 CSL on the Z4M ECU...
 Before the traction control button either disabled or enabled traction control... Now with M Track mode enabled, its now made the traction control but 2 stage... Stage 1 is M Track mode and Stage 2 is Full traction off. Here's a video of Mtrack mode vs TC Off on a E46 M3.. I've been playing with it in the basement at work (because ultra smooth surface) and it works as in the video above, once Mtrack mode is on, when you break traction and your foot is flat on the accelerator the revs dont fly up into the limiter, the system now holds the revs at a lower RPM like 3000 allowing you to hold your drift or slide easier without killing the power completely... All in all I'm rather impressed with it, why didn't they give us this from the factory.... I'm looking forward to trying it out on my next track outing...
__________________
|
Post Reply |
| Bookmarks |
|
|


