

| BMW Garage | BMW Meets | Register | Today's Posts | Search |
|
|
|
 SUPPORT ZPOST BY DOING YOUR TIRERACK SHOPPING FROM THIS BANNER, THANKS! |
|||||||||
Post Reply |
|
|
Thread Tools | Search this Thread |
| 12-18-2012, 10:01 PM | #1 |
|
Lieutenant
 
45
Rep 400
Posts |
AutoSolutions SSK install pics
First of all, A big thanks to the people who have posted their DIY's and advice, Onebluemcm, Shipkiller, Madrussian and BillWebSpace. The install was pretty straight forward following everybody's advise. I know that if you don't have RE tranny mounts installed before you install your SSK and you plan to in the future, get them before putting this SSK in. Having your exhaust removed allows you to torque all the hardware properly.
When I was removing the u-gaiter, I found that it is much easier to do if you push it through from the bottom instead of pulling from the top. Here are some pics from removing the exhaust... This made for some fun when it all finally came down on top of me. 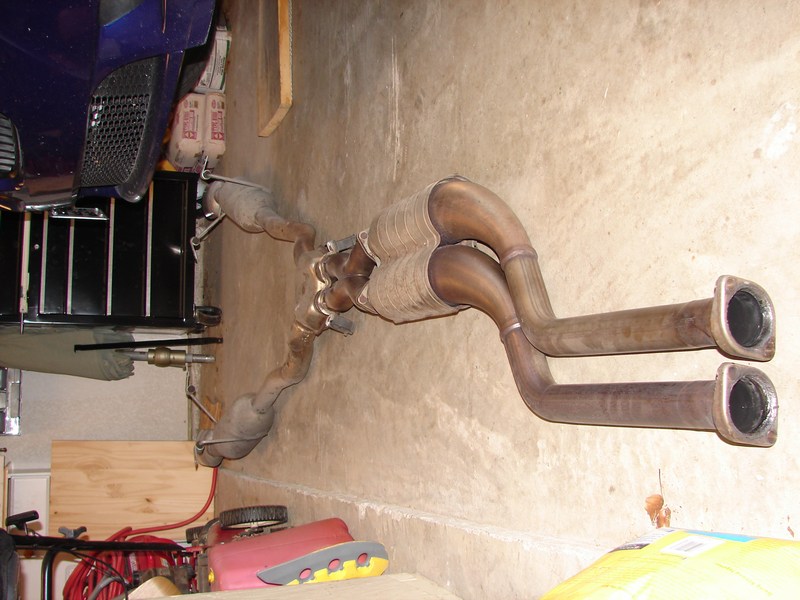 A pic of my Aeroturbine exhaust  A pic of my primary cats  The carrier pins. Easy to remove by pinching on the side and using a screwdriver to push up.  Here is how the selector rod is positioned to clear the guibo  Here are the tools I used to remove the shift rod joint (aka spawn of satan coupler). My old shift rod joint didn't have any flat surfaces so I used a pick and a small hex wrench. 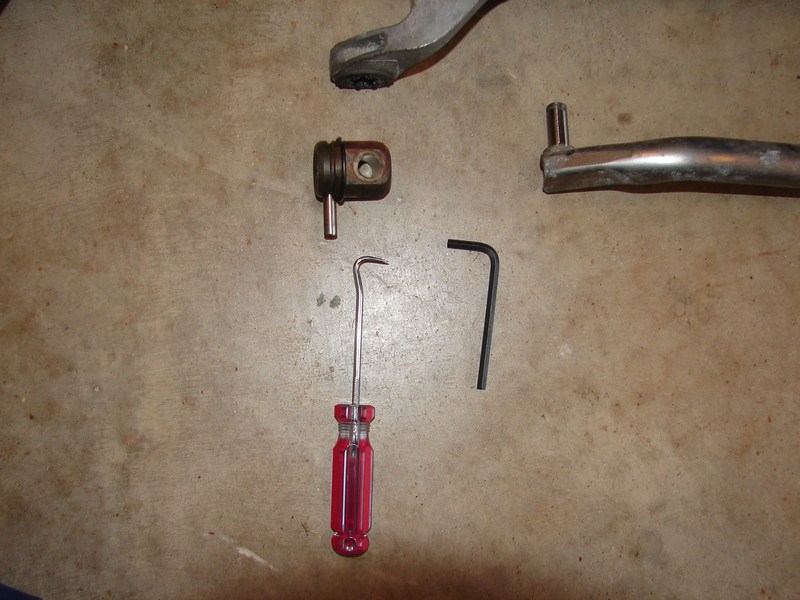 here's how I hooked the shift rod joint spring clip. I made sure to place the split just next the pin. Then I worked my way around putting the shift pin in the keeper channel. This is just another way of removing this, I tried Shipkiller's method but that didn't work for me.  Right now the AS SSK is mostly installed, everything has such a tight clearance. On the new shift rod joint, I was able to muscle the pin 90% with my thumb while shoving the joint onto the ball of the selector rod joint. The last 10% went on with the help of a hammer and screwdriver.  I'm currently replacing the shift rod. One Question, has anybody used the non chamfered bushings? I don't believe there is room for them. I was barely able to get one of the e-clips on without it (I used the chamfered bushing next to the shift rod. I don't see any way it can go on. Let me know. |
| 12-20-2012, 03:23 PM | #3 |
|
Lieutenant
45
Rep 400
Posts |
I finished putting everything back together yesterday. The exhaust was fun to put back. I had to lay underneath the car, head towards the mufflers with the exhaust on top of me. I used my feet to guide connecting to the headers, then put a couple of nuts in to hold the mufflers up. Then I temporarily installed the rear reinforcement bars to hold everything up while I tightened the headers up.
The SSK makes a HUGE difference in shifting. Everything is definitely more precise, noticeably shorter between gears. I would say that it makes as big a difference to shifting as a clutch stop makes to clutch travel. Now all I have to do is change tranny fluid... |
|
Appreciate
0
|
| 12-20-2012, 03:31 PM | #4 |
|
Dog Listener
711
Rep 7,850
Posts |
Yeah, exhaust is fun. I had to remove/re-install from headers back for an X-Pipe.
You've got new plugs for the transmission, right? (They're one use.) Also, obvious to someone with your skills, but always pays to take off the fill plug first just in case. I read somewhere here where rather than trying to pump fluids back in to the transmission from underneath, someone ran a flexible tubing line from on top of the engine, and had a buddy pump (or pour) from there. Sounds much easier than using a gear oil pump. YMMD. Just in case they're needed: Transmission: Fluid: MTF-LT-2 Plugs: 23 11 7 531 356 |
|
Appreciate
0
|
| 12-20-2012, 04:04 PM | #5 |
|
Lieutenant
45
Rep 400
Posts |
I've got both sets of plugs. I need to find the size of the diff hex wrench and buy one (I think it's 14mm). So I might have to buy a stubby set from Northern tools before I do that one. I'm going to wait until next week to change my tranny fluid. I got some Motul Gear 300 LS for the tranny, and will probably get some diff fluid from them also. Then I'll have Motul for brake tranny and diff.
|
|
Appreciate
0
|
Post Reply |
| Bookmarks |
|
|


