DIY INTRO:
This is a five part DIY for Z4M APR splitter installation.
PART IV IS OPTIONAL. Part IV adds strength, rigidity and adjustability that will be useful for track applications. Part IV may be overkill for street use. In part IV the lower engine cover is permanently altered. This is the only step that would prevent you from taking you car back to stock without buying any new parts. The lower engine cover price is $157.00
Part I:
-Hardware list & photos
-Tool list & photo
-Bumper removal instructions from 2007 BMW TIS
-Photo headlight washer line that need to be disabled
Part II:
-Splitter preparations
-Attaching the splitter to the bumper cover.
Part III:
-Splitter support rod installation
Part IV:
-Option 2 install (This complicates things but adds rigidity and adjustability that is useful for track applications. May be overkill for street use)
Part V:
-Complete installation
PART I
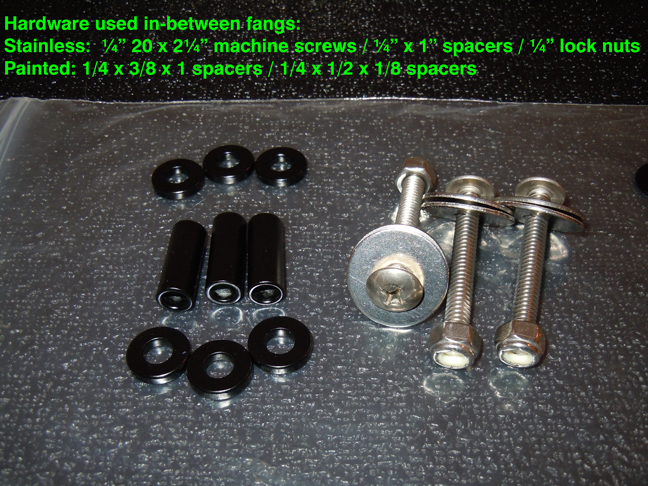
Hardware:
1. (8) stainless 1/4 20 x 1 machine screws
2. (3) stainless 1/4 20 x 2.25 machine screws
3. (22) stainless 1/4x1 fender washers
4. (11) stainless 1/4 20 lock nuts
5. (3) 1/4 20 nuts (temporarily hold the bumper in place while marking hardware locations)
6. (3) 1/4x3/8x1 spacers
7. (6) 1/4x1/2 washers or 1/4x1/2x1/8 spacers
8. (2) 3/16x2 molly bolt style anchors
9. (2) stainless 10mm splitter support rods
10. (2) stainless 3/16x1 fender washers
11. (8) OEM plastic expanding rivets (BMW # 51118174185)
12. [option 2 install only, see part IV] (3) additional stainless 1/4 x 1 fender washers
13. [option 2 install only, see part IV] (2) additional stainless 10mm splitter support rods
14. [option 2 install only, see part IV] (2) additional stainless 3/16x1 fender washers


Tools:
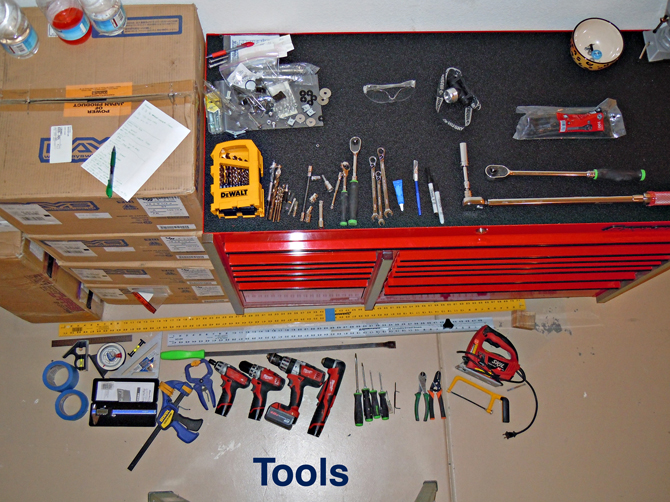
Prep:
1. Goof Off (decal removal)
2. 50/50 spray
3. Meguiar’s NXT 2.0 tech wax
4. Meguiar’s Ultimate Detailer
5. 3” blue painters tape
Human support:
1. Safety glasses
2. Nitrile gloves
3. Headlight
4. Caffeine
Measurement:
1. 72” ruler
2. 48” adjustable drywall square
3. 12” square
4. 6” rafter square
5. Digital caliper
6. Magnetic protractor
7. Sharpies
8. 1.5” blue painters tape
Wrenching:
1. 1/2 ratchet wrench (wheel removal)
2. 1/2 17mm deep
3. 1/2 2” extension
4. 1/2 Torque wrench (wheel installation)
5. 3/8 ratchet wrench
6. 3/8 T30 male (for engine bay bumper hardware)
7. 3/8 11mm standard
8. 3/8 2” extension
9. 1/4 ratchet wrench
10. 1/4 7mm standard
11. 1/4 8mm standard
12. 1/4 10mm standard
13. 1/4 11mm standard
14. 1/4 3” extension
15. 1/4 5” flexible extension
16. 8mm ratcheting combo wrench
17. 10mm ratcheting combo wrench
18. 11mm ratcheting combo wrench
Power Drivers:
1. 1/2 18V drill driver
2. 3/8 12V drill driver
3. 3/8 12V compact driver
4. 3/8 12V right angle drill driver
5. Drill bit set
Cutting:
1. Jig saw w/ fine blade (only for option 2 install. See part IV)
2. Mini hack saw
3. Exacto knife
Miscellaneous:
1. Needle nose pliers
2. Screwdriver set
3. Zip ties
4. Blue thread locker
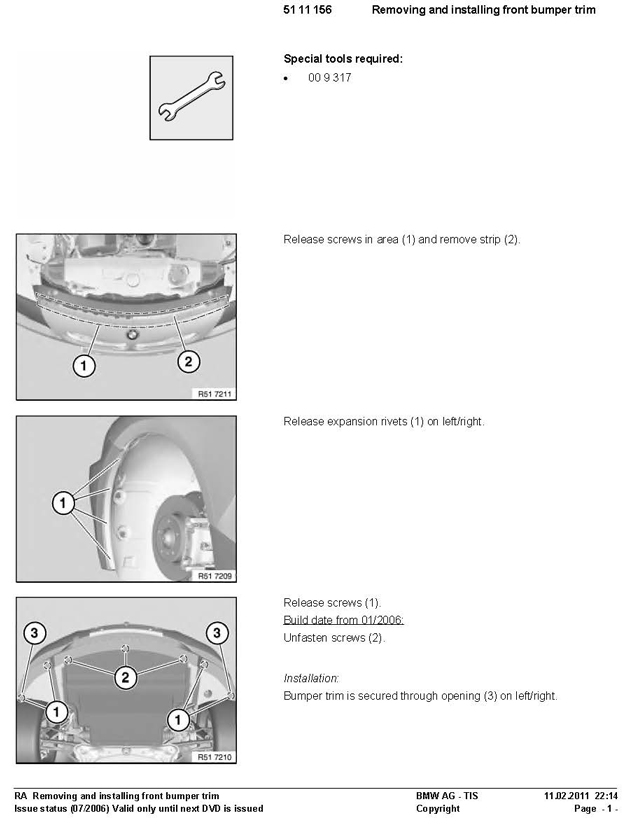
Bumper