DIY Intro:
50 Photos / 17steps / Post #1 Part I / Post #2 Part II / Post #3 Part III
Since I have removed and installed the axle back exhaust about a dozen times, I figured it was time to do a DIY. This is photo heavy step by step DIY including some good tips. The DIY only includes instruction for the passenger side. The steps are exactly the same for the driver’s side. You may also notice that the RPI's are already on the car while it is being jacked up. For the purpose of the
DIY, I put the passenger side OEM muffler back on after the car was off the ground.
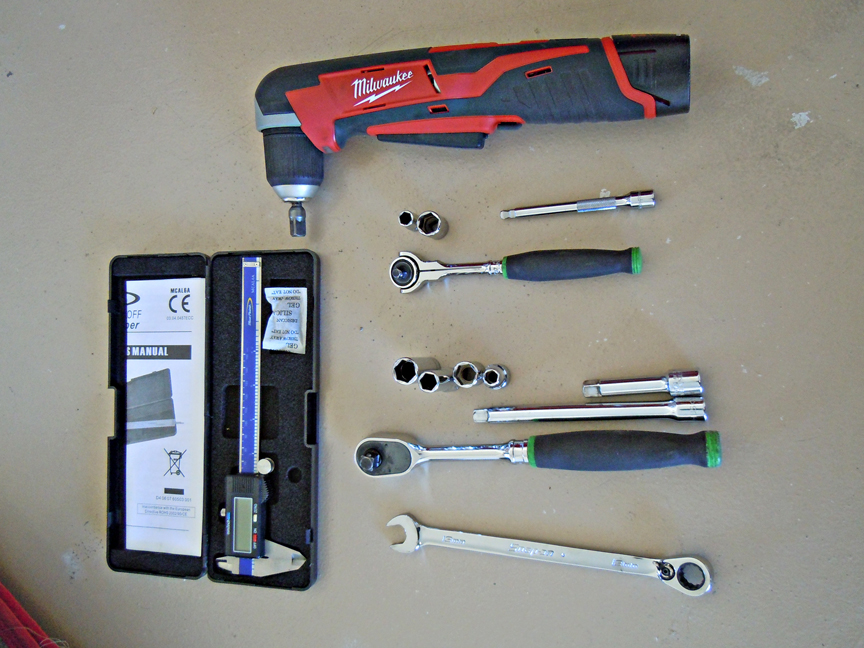
Hand Tools Used:
01. 3/8 ratchet
02. 3/8 13mm deep
03. 3/8 12mm shallow
04. 3/8 8mm deep
05. 3/8 8mm shallow
06. 3/8 2" extension
07. 3/8 4" extension
08. 1/4 ratchet
09. 1/4 13mm shallow
10. 1/4 8mm shallow
11. 1/4 3" extension
12. 13mm ratcheting combo wrench
13. Cordless 90 degree driver with 3/8 male adaptor
14. Graduated caliper
 Support Tools Used
1. 6 jack stands
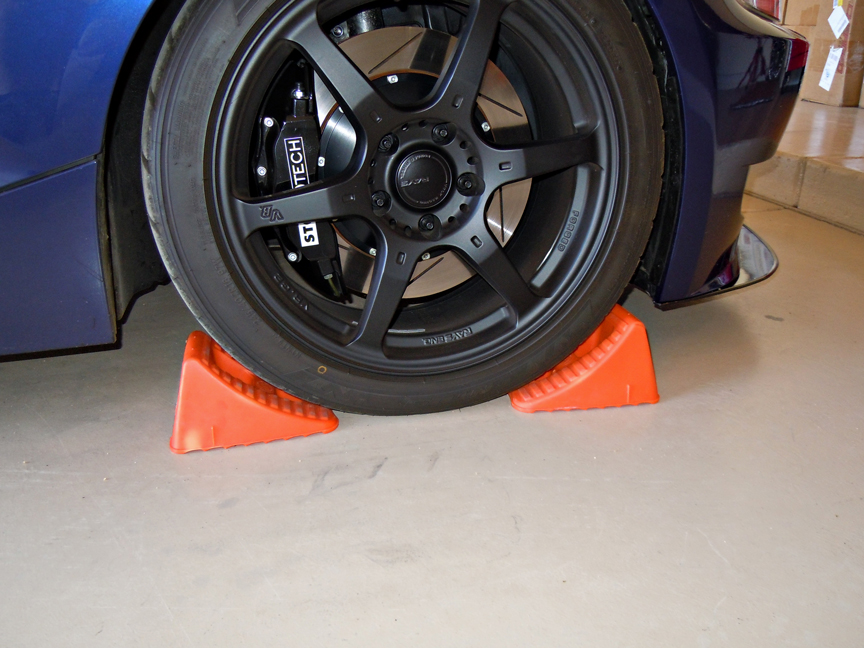
2. 3 wheel chocks (4 would be better)
3. 4 wood blocks
4. Shop blanket (creature comfort

)
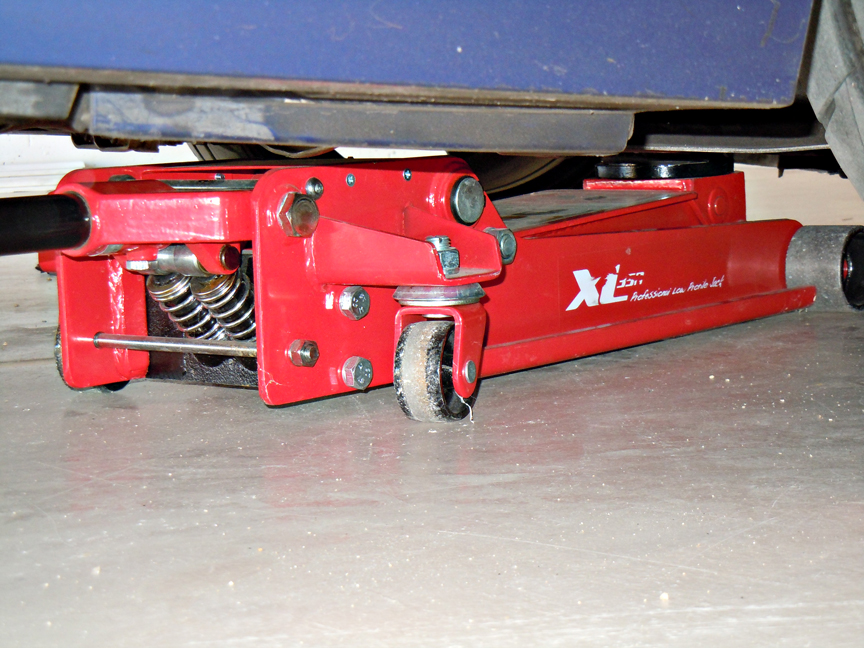
5. Low profile 3.5 ton jack

 Reference Material:
From realoem.com

From 2007 BMW TIS
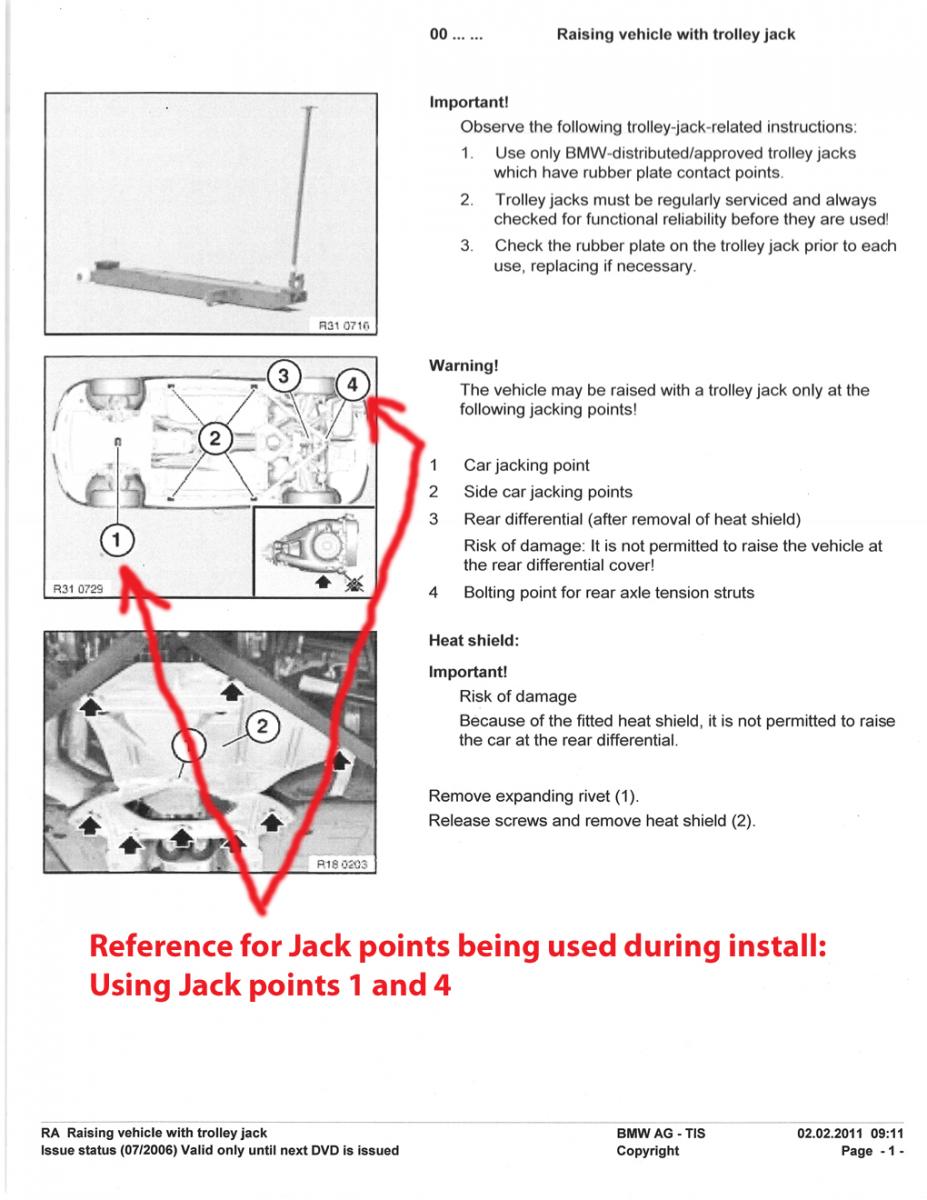 Step 1
Secure front wheels
 Step 2
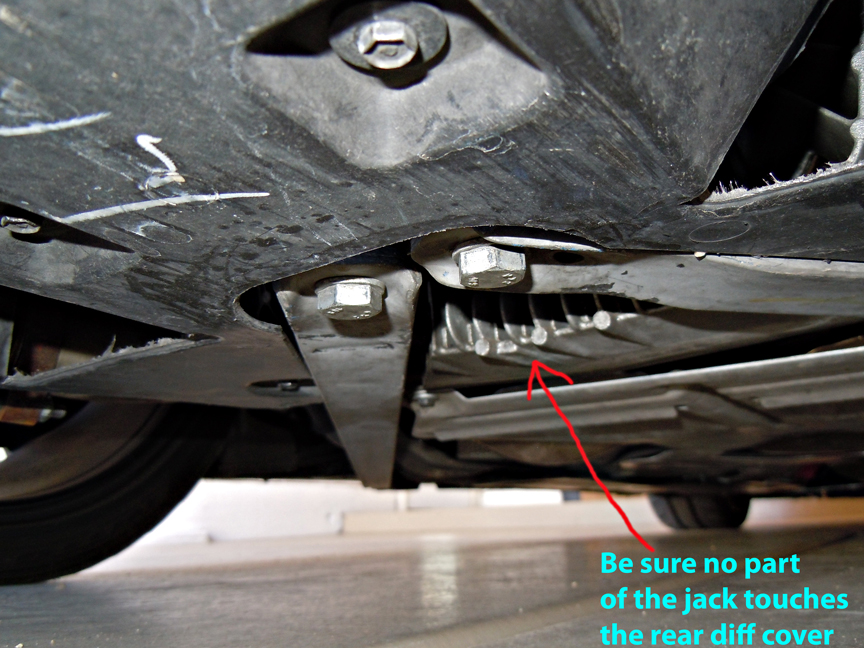
Locate jack point #4 from the BMW TIS ( be careful around the rear diff )
 Step 3
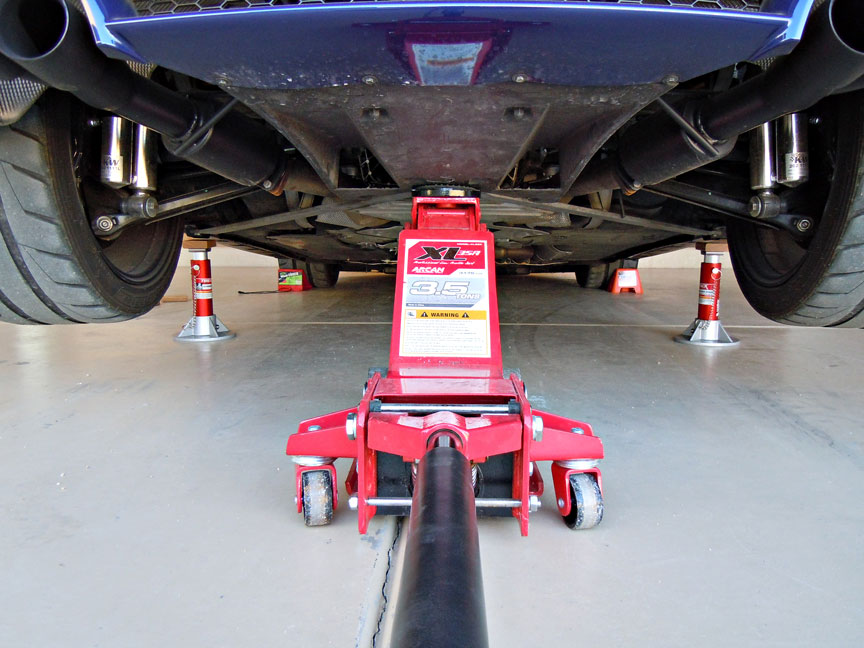
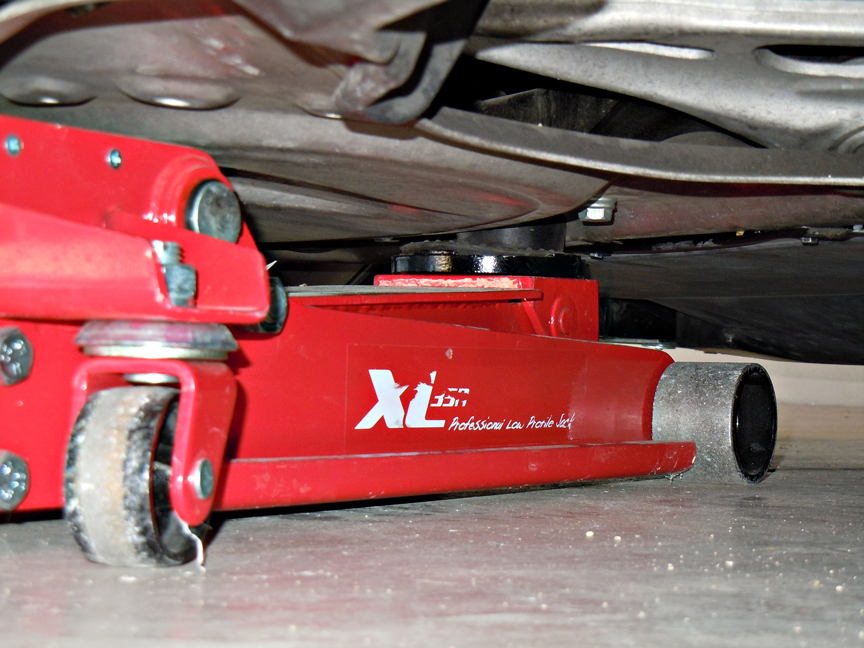
Jacking up the rear of the car. Go through the next three photos and read the tips before you do this step.
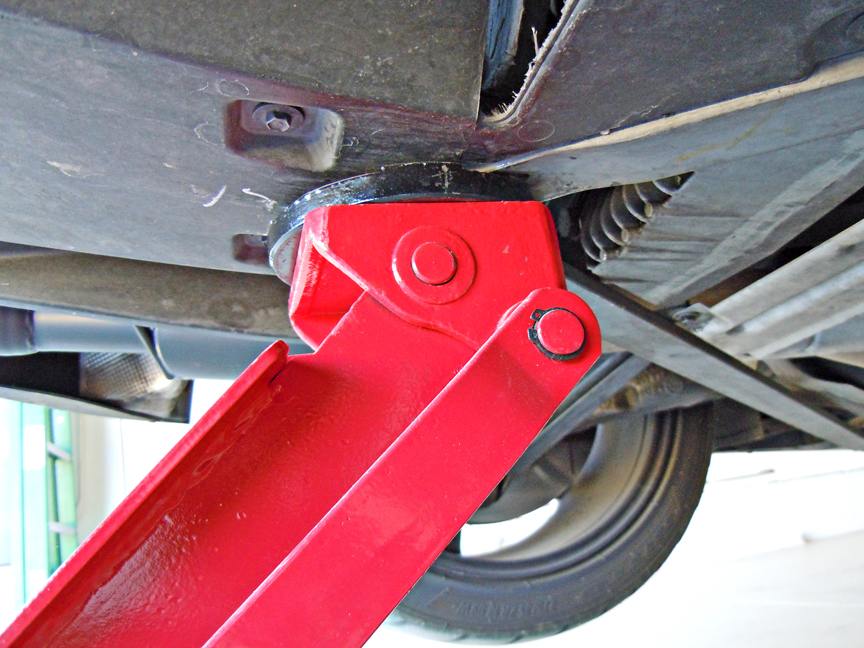
lining up the jack
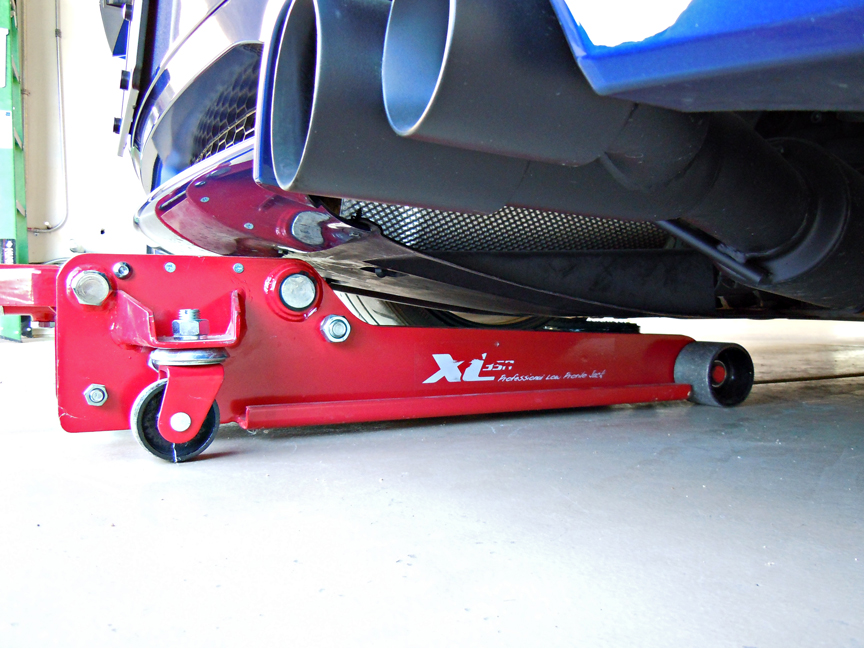
jacked up with good alignment and not touching the rear diff cover
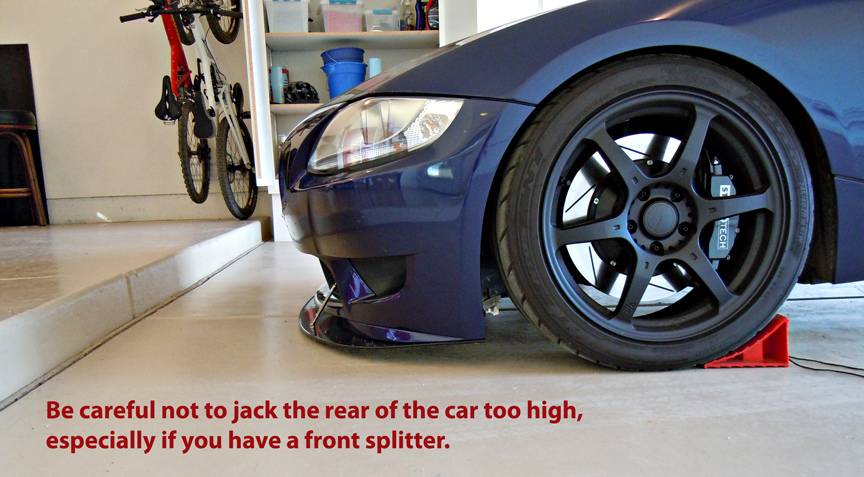
Watch the front
 Step 4
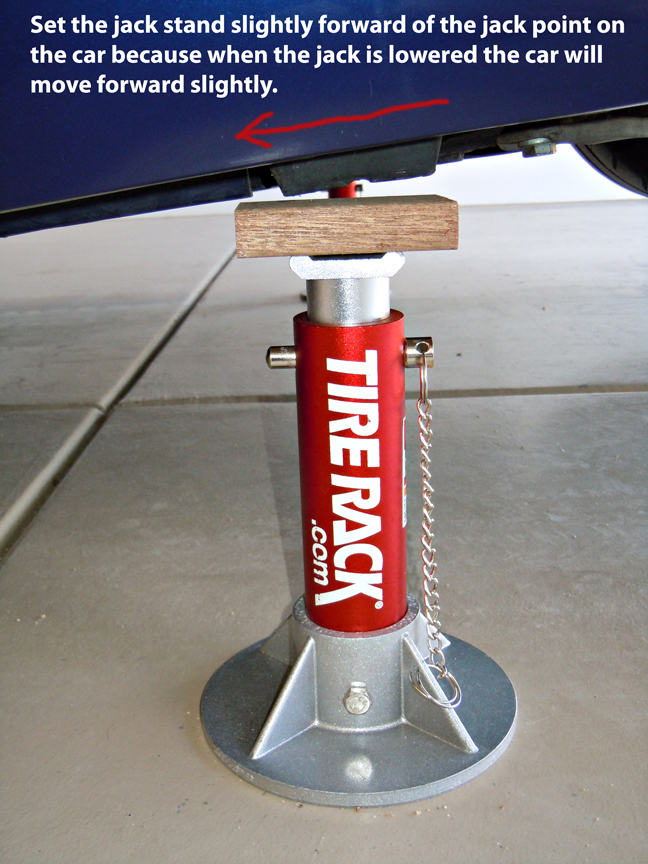
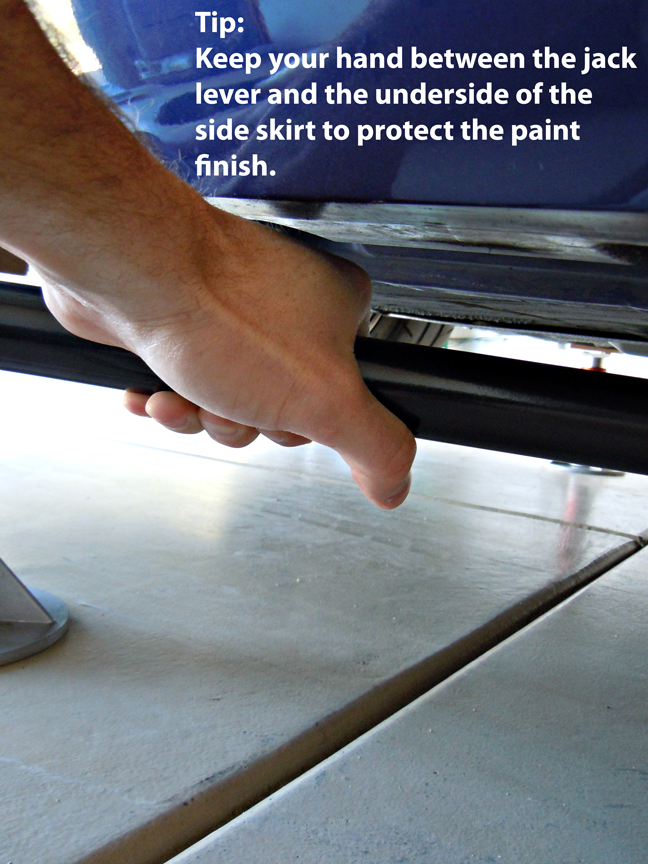
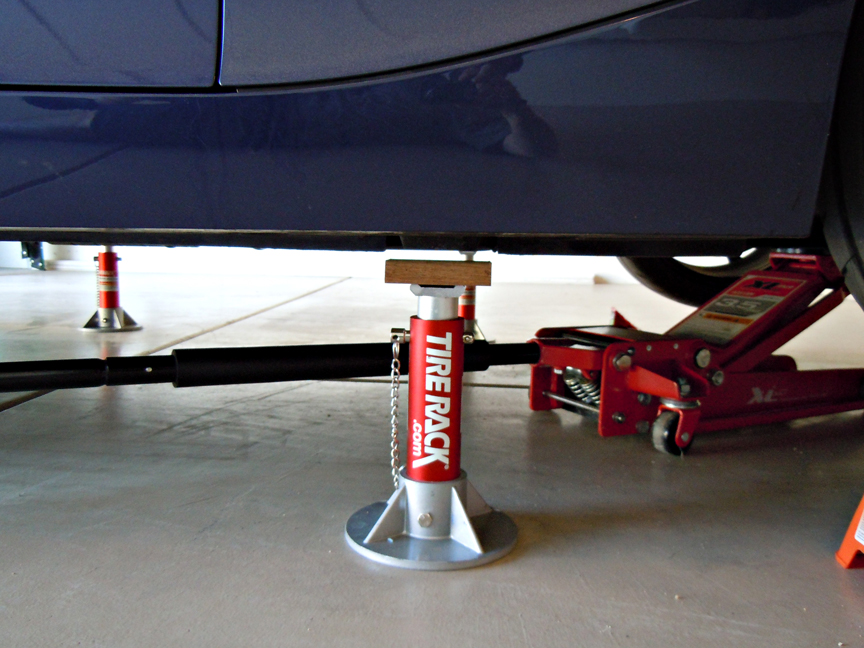
Jack stand/wood block placement. (review the next two photos/tips)
Tip
 Step 5
Locate the front jack point (BMW TIS #1)
 Step 6
Review the next three photos related to jacking up the front of the car
 Step 7
Front jack stand/wood block placement
 Step 8
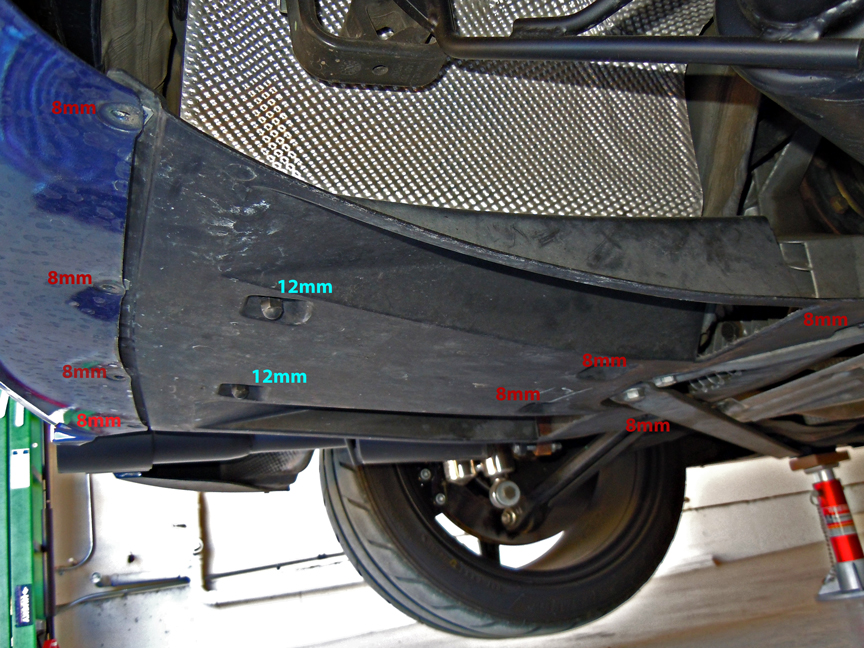
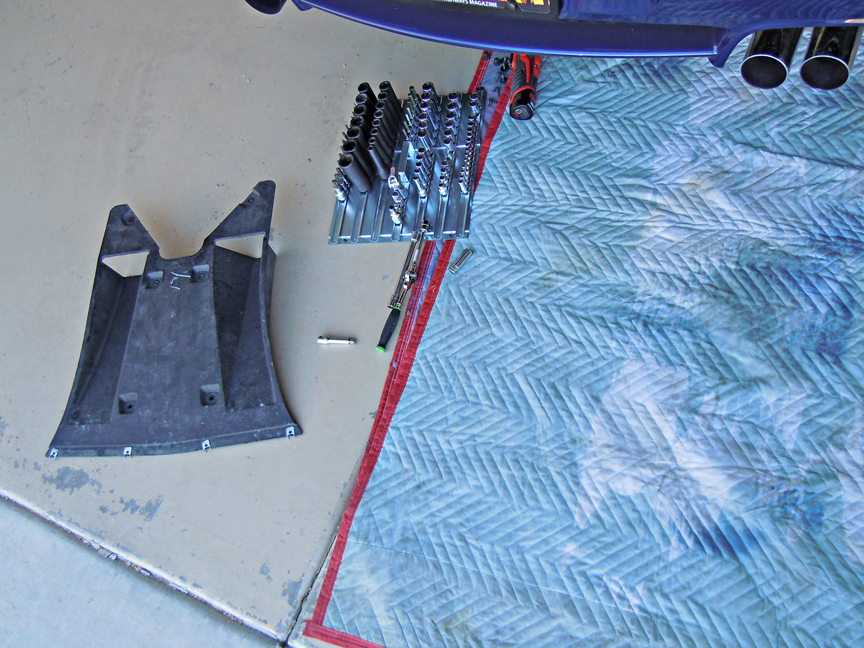
Remove the rear diffuser. There are 8-8mm fasteners and 2-12mm caps